Reverse Engineering Malware Encryption
This is an analysis of the file malware201 in the RE101 reverse engineering challenge and the custom encryption algorithm it uses to hide strings.
Though this “malware” was sourced from a challenge, it still depicts the active malware landscape to an accurate degree.
Also, the flag for the specific question regarding this malware will be provided but I highly recommend you read through this and not jump to the bottom. And if you don’t want to see the flag, don’t worry, I’ll give you a spoiler warning.
The File
The malware is a Linux 64-bit elf executable, which when executed gives the following output.

The program helps us out and provides a plaintext and its corresponding ciphertext, this will aid in our reverse engineering and ultimately help us confirm whether we reversed the algorithm correctly.
The tools
Cutter: Cutter is a reverse engineering tool that can analyze any binary and even emulate instructions. It can also debug a program by running it and gives you full access to its memory.
Python: Python is a beginner-friendly programming language we will use to rapidly prototype our ideas on what we think the malware is doing.
The Analysis
The first thing I did was to open the malware201 file in the cutter to see how the “Malware” basically works by opening the “main” function’s graph view.
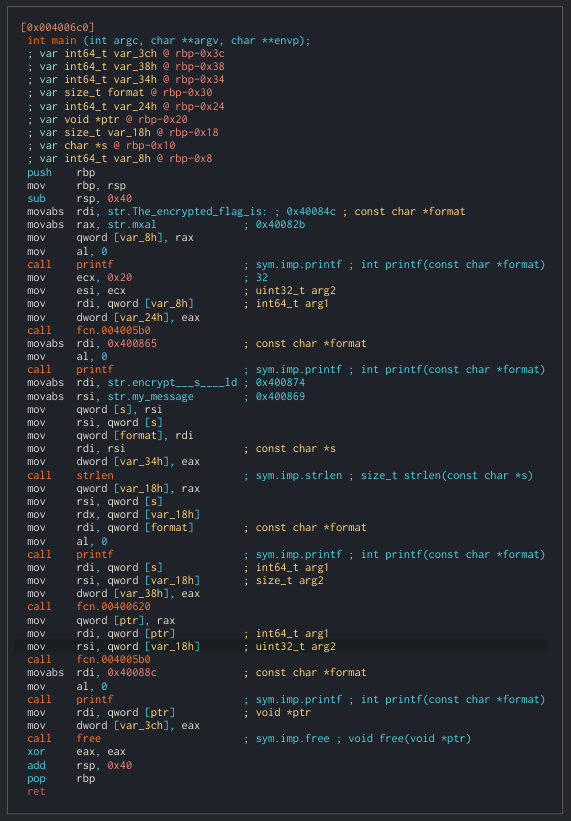
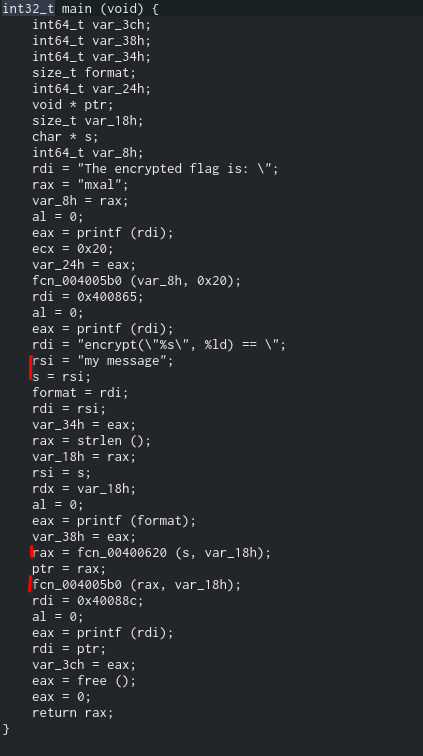
In the graph view for the “main” function, nothing interesting is found, ignoring all the mov instructions, just some string declarations, printfs, and function calls are present.
This meant that whatever this malware was doing, it was doing it from a function elsewhere in the binary. And if we open the disassembled code, a few things catch the eye (Denoted by red lines on their left).
- The string “my message” which we’ve seen from the output as being encrypted is assigned to rsi
- The value of rsi gets assigned to s
- fcn_00400620 uses the value as an argument and returns a value (most-likely a pointer)
- fcn_004005b0 reads the value and does not return anything
We are painting ourselves a good picture of what is happening so far, all that’s left is to figure out what fcn_00400620 & fcn_004005b0 do. Let’s open their disassemblies to find out.
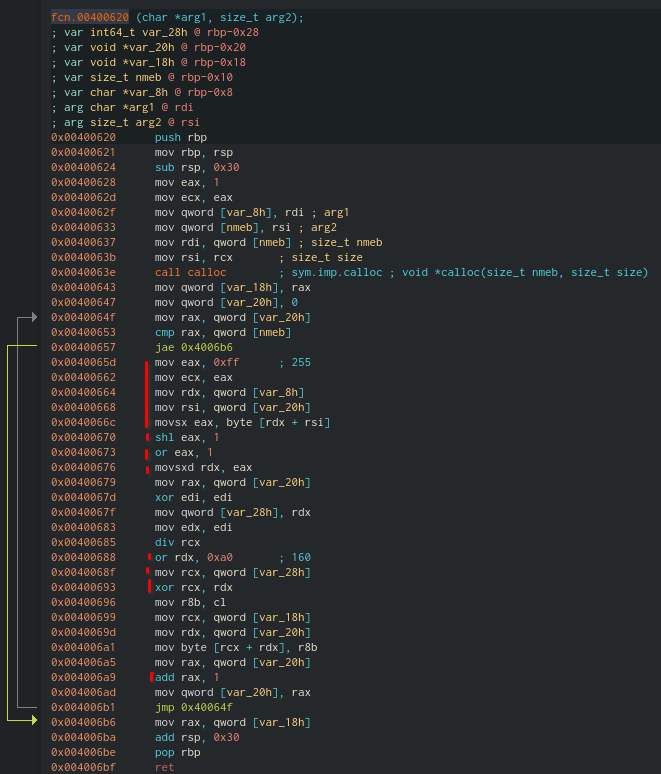
fcn_00400620
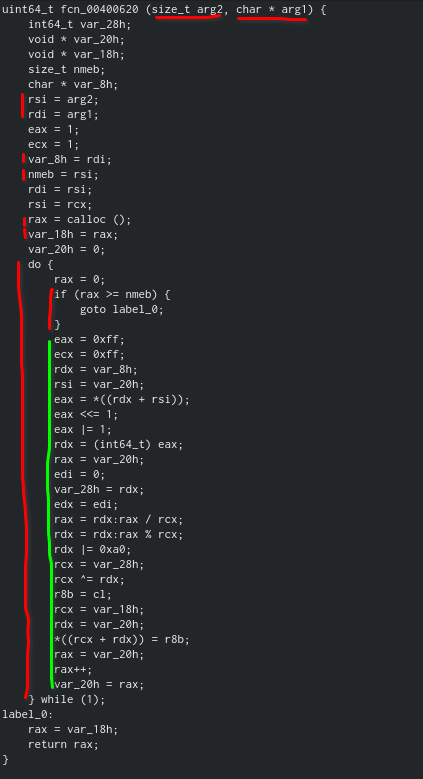
- The function takes two arguments, a size and a char pointer (An array of characters).
- The values get assigned to rdi & rsi respectively.
- Those values then get assigned to var_8h & nmeb respectively
- rax is set to the return value of calloc() (This means a new memory space was
- created which rax points to)
- var_18h is set to the value of rax
- A huge for loop that loops over each character in the string provided as the second
- argument and does a bunch of operations (Green) on them.
- rax is set back to var_18h which holds the original calloc memory pointer
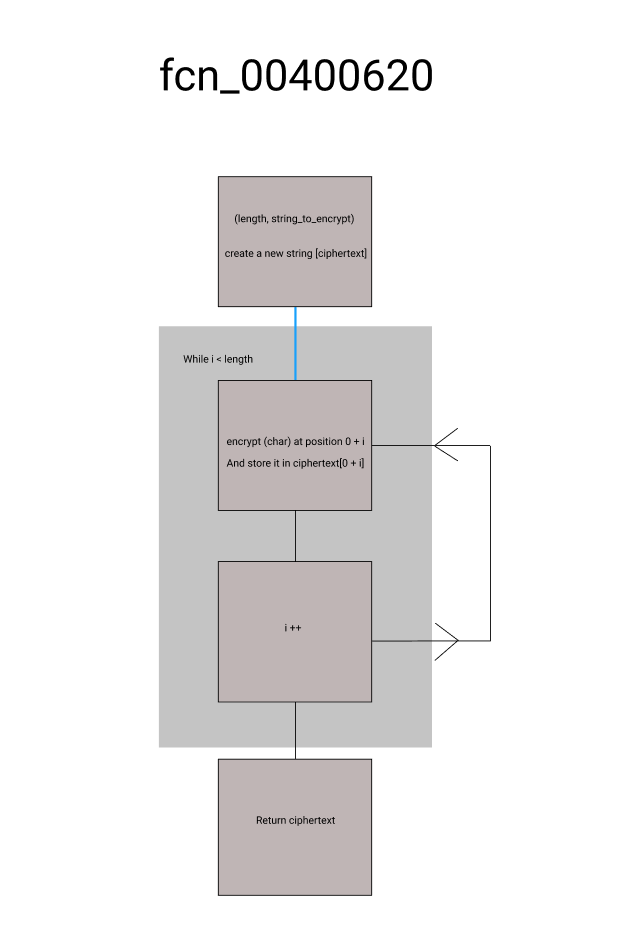
This is most likely our encryption function, it takes a string, and for each character in that string, it performs certain operations on them and stores the result in new memory space. When done, it returns a pointer to that new memory space.
This image gives a clearer picture
fcn_004005b0
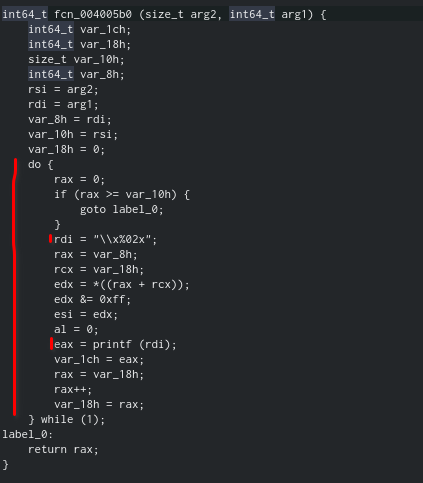
1. The function takes a size and integer (Most likely a pointer) and assigns them variables in a similar manner to fcn_00400620
2. It goes through every item and prints them in the format “\\x%02x” (This means”\x” + a two-digit hexadecimal code)
This is almost certainly the function responsible for printing the hexadecimal ciphertexts seen in the program’s output.
Here’s an image depicting the main flow of the program

The Reversing
With the encryption function identified, we can proceed to reverse-engineer the algorithm. To do this, we’ll use Cutter’s debugging feature to step through the loop in fcn_00400620 and observe how the memory changes.
After setting a breakpoint on the mov eax, 0xff …
I stepped through the program one line at a time taking note of how the memory changed
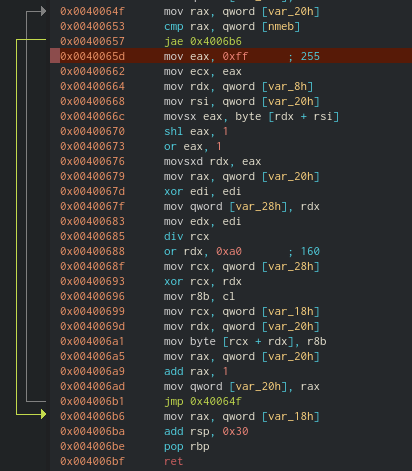
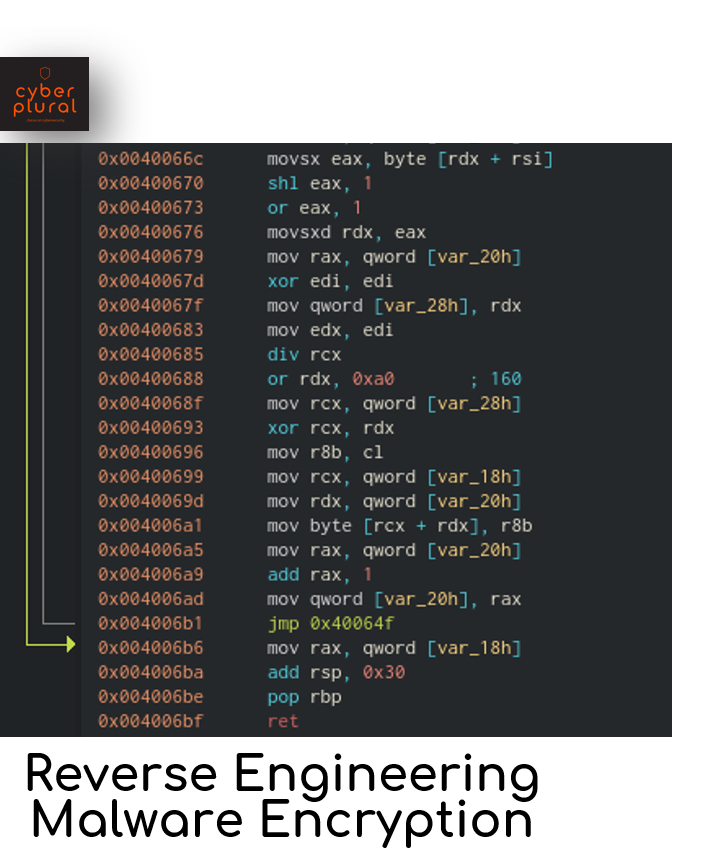
Here’s the assembly for the function as a reference
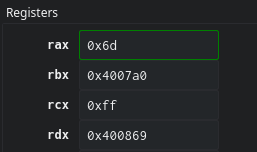
- The first block of mov calls simply moved the value of the first character of the string to eax (Last byte of the rax register) like so.. [0x6d = “m”]
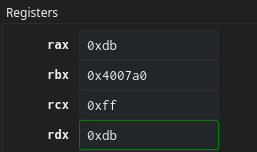
2. The shl eax, 1 instruction shifts the last byte of rax by one bit.

- The or eax, 1 and movsx rdx, eax bitwise ors the last byte of rax with one and moves it to rdx
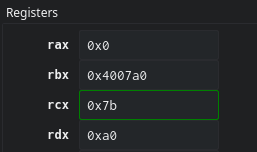
- The or rdx, 0xa0 sets rdx to 0xa0 and mov rcx, qword [var_28h] moves our previously modified value in rdx back into the registers but in rcx this time.

5. xor rcx, rdx bitwise exclusive ors the values of rcx and rdx and stores them in rcx.
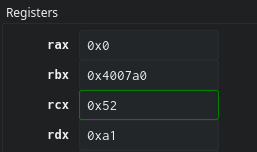
6. Finally, add rax, 1 increases the loops counter and make sure that by the time the loop comes back round to step 5, the next character in the string has gone through 2-4 and rdx will be 0xa1.
With the algorithm figured out, let’s write a decryption script in python to check whether we are correct.
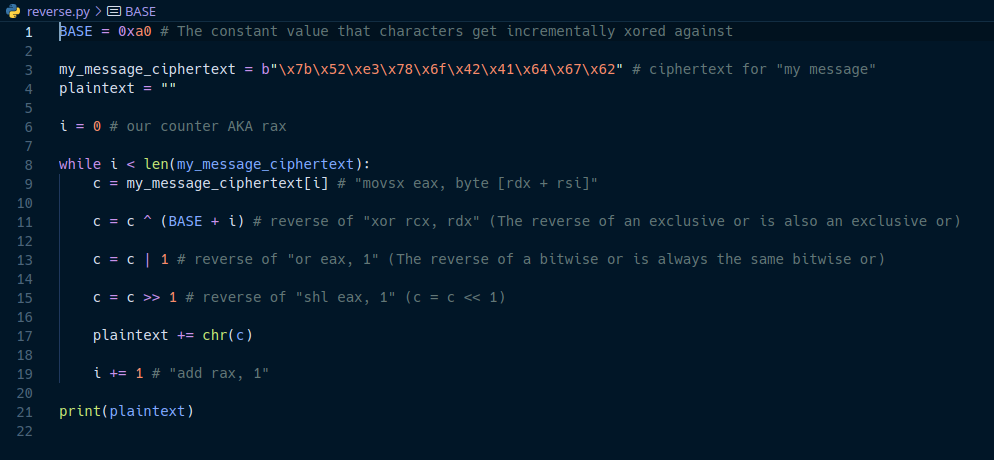
When the above script is run with the flag ciphertext, this is the output.

And I could not agree more
Written by Mainsara Tsowa.
Leave a Reply